Fill Watercolour Pans ... even with things that aren't watercolours
general journal junk
-
idealog
I initially wrote this years ago, but the whole thing was a mess and a bit outdated, so I've tidied it up a wee bit.
If you choose to use paint or pigment sticks as solid paint with a brush rather than sticks to draw with, here's some notes on cutting them down to put into watercolour pans. Given the size of the sticks, you might even be able to create multiple pan sets from one set of sticks, so that you could have one for home and one for travel. Or a set for you and one for a friend.
Notes:
Please note that all of the instructions are based on using full pans, not half pans - but the instructions can be tailored for the use of half-pans as well.
I filled pans with Derwent Inktense Blocks, Derwent ArtBars (discontinued), Watercolour tube paint, Daniel Smith Watercolour Sticks, and gouache. You can also do it with Caran d'Ache Neocolor IIs or other water-soluble crayons or pastels.
You will need:
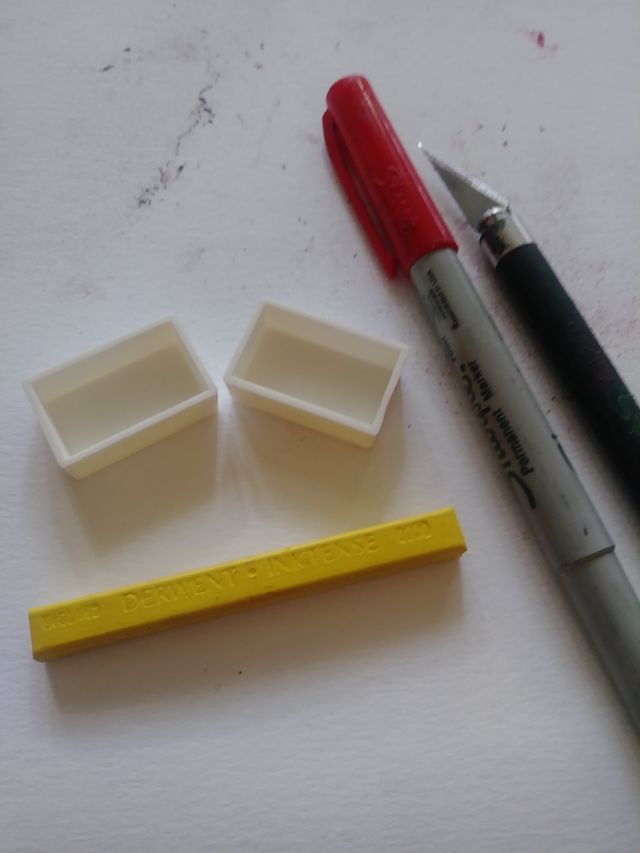
- empty watercolour pans, full - get opaque pans, as the clear ones are much harder to read text on
- a measuring tape - preferably one you won't care about getting damaged or dirtied with pigment
- a Sharpie, or other permanent marker/pen
- an X-Acto, or other fine cutting knife
- paper towels, or other foldable paper/thin surface to cut on - a smooth surface is best, because it’ll be easier to knock the smaller pieces onto a palette for later use. No sense in wasting!
- shallow containers to put your filled pans in - I used document holders and an old Derwent Inktense tin
- double-sided tape, sticky dots, Velcro dots, thin magnets to affix your pants into the above
- toothpicks - for stirring wet media
Now, to work:
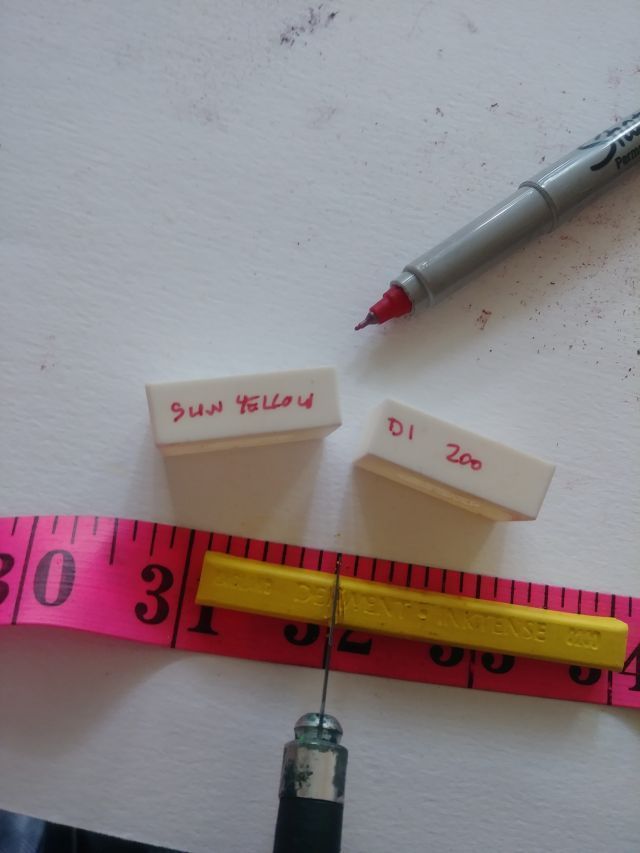
- Label the pans clearly using the Sharpie prior to filling them. This goes for all media types. Labelling on the sides seems to work out best. I put the colour name/number on one side, and the set name on the other.
Filling the pans with blocks or sticks:
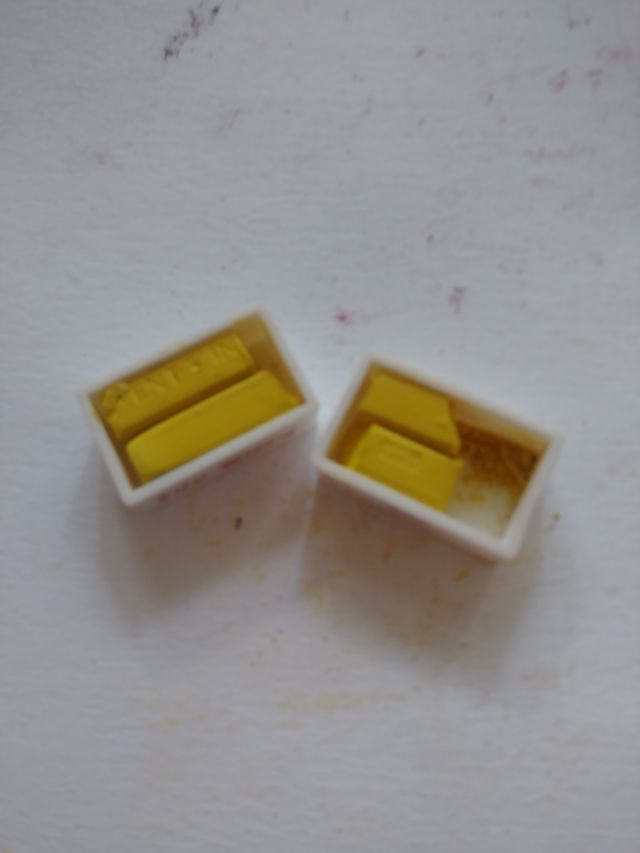
- You can cut the blocks into any length you want, but if you're using full pans with your Inktense Blocks, you can cut them in four equal quarters.
- To make life easy, label the pan with the name of the colour, its number if applicable, and the name of the brand/product line. Since pans are small, I used short forms for brands to make life easier: DI - Derwent Inktense, DS - Daniel Smith, DA - Derwent ArtBars, VG - Van Gogh. Etc.
- Note that across brands, names might be the same but the colours not. This makes adding the brand essential so you know which to refill with later when you empty your pan.
- Make sure to do the cutting over a piece of paper, paper towel, or other movable surface, so that you can knock any shavings excess from the block cuttings into the applicable pans.
- When it comes to the Derwent Inktense blocks, you can put two big chunks in each pan.
- You can choose to only cut off enough to fill one pan at a time, and just replenish from your leftovers when you run out of the pan contents. If you do it this way, make sure you leave till last the end of the stick that has the colour number on it so you can keep track of what colour it is.
- I did it two pans at a time just to get the messy parts out of the way all at once, and it does also allow me to create two sets: one for home and one to carry with me or to gift.
- As Derwent ArtBars (discontinued) are longer than Inktense blocks, you can fill just one pan at a time, cutting off two chunks from the ArtBar to fill a pan, and leaving the rest in its wrapper - leaving the end of the label with the colour name/number - to replenish from later. You can fill about three full pans with one ArtBar.
- You can use the tip of your cutting knife to lift the edge of the labels off the ArtBars and other wrapped sticks, as it's not the easiest thing to get the labels off with a fingernail without ending up with paint under your nails. I suggest peeling the whole bar before you cut it, so you only have to do the peeling once instead of multiple times. The ArtBars can get very sticky, and that makes it hard to get the wrappers off.
- Make sure to clean your knife, hands, and cutting surface (if necessary) after each colour cut to avoid mixing colours together in the pans.
- If you do mix two colours together by accident, mix them together well and label the pan appropriately. You've just created a new colour! This is especially important to think about when mixing tube watercolour paint. I stirred a yellow with a toothpick that had a little green on it because I'm daft, and ended up with a paint I hadn't intended. It was a nice ochre though!
Filling the pans with watercolour/gouache:
- If you're filling your pans with watercolour/gouache tube paints, fill the pan to almost the top then stir gently with a toothpick for a bit to ensure the pigment and binder (which sometimes separate in the tube) are re-mixed. Stirring also helps make sure that the paint spreads out to utilise the entire inside of the pan and no gaps are left around the edges. Let this paint dry and, if necessary, repeat the process until the pans are filled to a level that you're satisfied with.
- Remember not to do this with acrylics or oils, because once those dry they can't be re-wet. Do this only with watercolour or gouache tube paints.
- Make sure you cover your pans until the paints have dried fully to make sure no dust or other items end up in the paint. Watercolour paints, for example, can take a few days to dry - or, in the case of some honey-based paints, never fully dry at all. I put my pans into a closable plastic container that still allows some airflow but does cover them well and keeps them protected from contaminants while they dry. Covering them with a bowl on a countertop also works.
Pastels/Pencils:
- You could fill pans with shavings from water-soluble pencils as well. So be mindful where you sharpen so that you can save up the shavings. You could also deliberately shave up entire pencils just to do this, but that's a lot of time and expense. Might be an interesting consideration when doing certain kinds of collage or texture work though.
- There's some videos on YouTube that give you tips on how to make your own PanPastel style pastels out of regular soft pastels (like the Gallery ones by Mungyo) and rubbing alcohol. Watercolour pans would work a treat for the storage of such.
Storage:
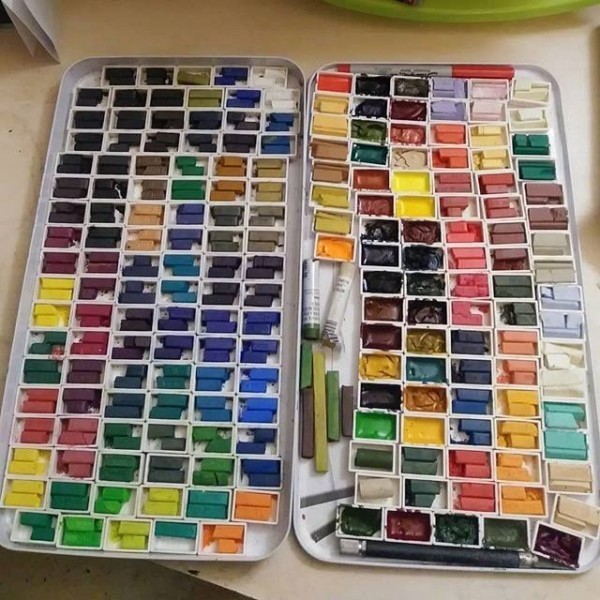
- As far as containers go for permanent paint storage, you can use either plastic or metal. Some of the things I've used are a cookie sheet with a lid, an old Inktense 72 tin, and a document holder. While some like airtight, I prefer not because of the potential for mould. You can fit 106 full pans into the original Derwent Inktense Blocks 72 set tin.
- You can use traditional watercolour field palettes as well, but the largest I've seen so far allows only up to 48 half pans or 24 full pans unless you remove the metal part that holds the pans. If you do, you can fit a much larger number of pans into the palette.
- If you have the colours to warrant it, and the money, you could separate the colour groups each into their own field palette. This is what I've done with watercolours. My pigment sticks are in an old Inktense tin and document holder.
- In any of these cases, it's easy to create a swatch sheet that you can tape into the lid of the container. This way, you can swatch the paints in the same order you've put them in the pan.
- Using two-sided glue dots to secure the pans to the cookie sheet can be hit and miss, and not terribly secure. However, they are good enough to keep the pans in place when moving them from storage to use. I would not suggest waving your pans in the air like you just don't care. That way lies a disaster. The more you touch/dirty them, the less clingy they are.
- The pluses of using the document holders are space-saving, easy cleaning, allows for airflow when drying pans by propping the lid open with the locking clips, and when fully the closed the lid is plenty far from the top of the pans so anything wet shouldn't stick to the closed lid. These document holders can take up to 112 full pans.
Notes:
- I used full pans because it's easier to load a long bristle brush with paint. With half pans you can only load a small portion of the bristles.
- You can remove the permanent marker from the pans easily using a cloth and some rubbing alcohol. Make sure to do this in a well-ventilated area.
- Jack Richeson gouache in pots separates like a mad bastard, and the balance of binder to pigment was not consistent across all colours. The pots were so poorly balanced that some were like stirring through water and others were like trying to stir through chunky pudding. It was not even possible, with some of the pots, to stir them to a consistent viscosity. I might have had a bad batch and all, but I will not be purchasing these again.
- There may be some reference in here to Derwent ArtBars. They are a discontinued product. They were a softer pigment stick that were a bit gummy and not the easiest to use. It’d be great if they brought back the colours in another format though. Maybe a legacy-type set of Inktense blocks.
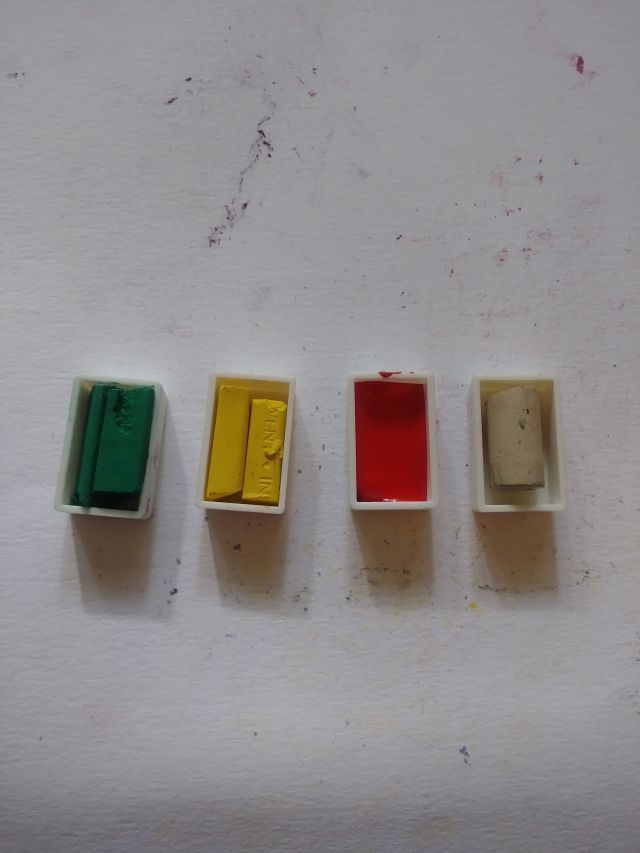
The process in pictures:
From left to right: Derwent ArtBar, Derwent Inktense Block, Rembrandt Watercolour (tube), and Daniel Smith Watercolor Stick.
On the right are gouache, watercolours, and watercolour sticks. On the left are ArtBars, Inktense blocks, Inktense paint pans. These images are from 2018/2019.